Build Process and Order Guide
Our goal with every PC is performance, reliability, stability and quiet operation. We achieve this by only using the highest quality parts in our PCs. Our commitment to quality allows us to offer a 5 year warranty.
From time of order our standard builds take 3 days to complete. This is extended to 5 days for premium builds. All our PCs are custom and built to order, we don't sell pre-built machines.
Here is the process we go through with every PC
Step 1: We spec up a PC to your budget / needs and send you an invoice. You pay a 10% deposit. When the deposit is paid we order the parts, the remaining balance is paid on collection.

Step 2: The parts arrive from our supplier
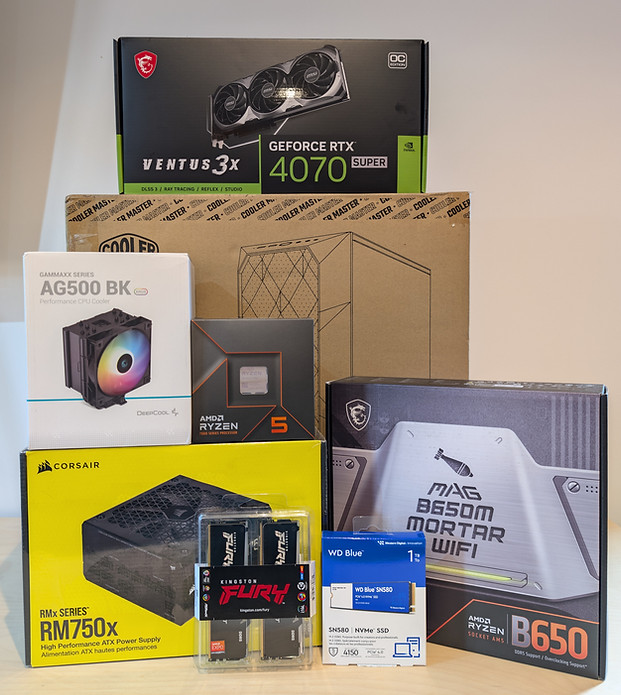
Step 3: The Central Processing Unit (CPU), Random Access Memory (RAM), CPU cooler bracket (if an aftermarket cooler is used) are attached to the motherboard. Afterwards, the CPU paste is added directly to the top of the CPU and the CPU cooler is mounted.
This build also features an M.2 NVME SSD. This goes under a thermal plate on the motherboard. If a motherboard doesn't have a thermal plate, we add a custom plate directly to the SSD.
Note: We only use Arctic MX - 6 or Thermal Grizzly CPU paste. This is the best CPU paste on the market. Better cooling means less heat, lower ambient temperature within the case and longer component lifespan.


Step 4: The Power Supply (PSU) is tested with a Thermaltake Dr Power II System, then double checked with a multi meter.
Note: We only use Gold Rated PSUs in our gaming PCs and tend to oversize what is needed based on the power draw of the PC. Safety, stability and efficiency is important to us and lower rated PSUs (eg. Bronze) would only be used for office PCs. It is also beneficial to keep your PC behind a surge protector.


Step 5: The PSU and Graphics Processing Unit (GPU) are connected to the motherboard and the system is power cycled a few times.
The Basic Input / Output system (BIOS) is then updated and the Extreme Memory Profile (XMP) for the RAM is enabled. This particular system uses 16GB of Corsair Vengeance DDR4 (3600 MHz). If XMP isn't on, RAM just runs at it's stock speed of 2133MHz. The stock speed of DDR5 is 4800MHz.
Note: It is important to update the BIOS as this firmware forms the relationship between the hardware and software. BIOS updates bring increased performance and stability, bug fixes and security updates.

Step 6: The RAM is tested in MemTest86. This program tests and stress tests RAM for errors and takes around 1 1/2 hours per 8GB of RAM. You can see from the picture below that 16GB RAM at 3600MHz was tested for just under 3 hours. This test also stresses the CPU.
Note: With MemTest86 you can choose how many passes you run. The more passes, the longer the test takes. Some errors only present themselves after multiple passes, so we always do a full set of 4. RAM is further tested by using TestMem5, MemTest Pro, Karhu and y-cruncher, but more so when we're taking RAM past 3600MHz (DDR4) and 6400MHz (DDR5).

Step 7: Windows 10 / 11 is installed, activated and fully updated. Then chipset , GPU, network, audio and storage drivers are downloaded and installed. This means your PC is ready to play when you get it.
Note: Always download chipset drivers from the Intel / AMD website to ensure they are up to date. GPU drivers should also come from the NVIDIA / AMD website. Never use third party programs to install drivers or "repair" your PC.
Step 8: The PC is now ready to tested, optimised and overclocked.
We use Aida64, BurnInTest, Crystal Diskmark, FurMark, Intel XTU, OCCT, Prime95, Ryzen Master, Unengine: Heaven and Superposition
Note: While overly thorough, these tests ensure the reliability of our PCs.

Step 9: The components are placed in the case along with the power supply and the motherboard power, front panel connections and fans are cabled in.


Step 10: The PC is cable managed, the back cover placed on and the GPU is installed.

Step 11: Your PC is complete and ready for collection.
The PC comes in the box the case came in. You also receive anything that came with the components used to build your PC (eg. extra PSU cables, stickers and bundled games)
Note: Our PCs are cleaned after the build process. Protecting ourselves and our communities from the Coronavirus is important and we take the safety of our customers seriously.
All packaging and boxes from the individual components are recycled responsibly.


